
Equipment
 Adept's Bag
 Adept's Cape
 Shield
 Minor Healing Potion
 Pork Omelette
 Journeyman's Riding Horse
Abilities
 Main handBloodletter
 Deadly SwipeDagger Fighter level 1
 DashDagger Fighter level 3
 Lunging StabsDagger Fighter level 1
 Deep CutsDagger Fighter level 1
 HeadMercenary Hood
 CleanseLeather Hood Fighter level 1
 Balanced MindLeather Hood Fighter level 1
 ChestMercenary Jacket
 BloodlustLeather Jacket Fighter level 1
 Balanced MindLeather Jacket Fighter level 1
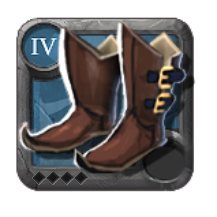 FeetHunter Shoes
 Refreshing SprintLeather Shoes Fighter level 1
 Quick ThinkerLeather Shoes Fighter level 1
How to play
A lower-cost roaming set that keeps Bloodletter's escape options without relying on expensive artifact armor.
Scout before dismounting, keep a route to the next exit, and use the set to learn engagement ranges without risking a premium loadout.
Strengths
- Low replacement cost
- Fast travel between objectives
Weaknesses
- Lower defensive ceiling
- Weaker into organized groups
Practice the ability sequence
Use Deadly Swipe to reposition without spending every movement tool. Keep Dash or Lunging Stabs available for an exit. Inspect enemy defenses before an execute attempt; a low-health target can still block or evade it. For gathering, spend mobility on distance and return to your mount rather than starting a fight.
When to change the loadout
Sunder Armor is a targeted alternative to Deadly Swipe. A shield reduces off-hand expense for practice, while Mistcaller supports a cooldown-focused escape plan. Neither substitute reproduces Muisak's effects.
Prepare a complete replacement set
The spell panel shows Q, W, E and passive choices, including their source unlock requirements. Confirm those unlocks on your Destiny Board before purchasing the set. Ability names and availability come from the linked source revision; check the current in-game tooltip before departure.
The listed bag and riding horse provide a starting transport choice. Compare an armored horse when protection matters more than the cheapest replacement; a mount is not a guarantee of escape. Price the equipment, food, potions and transport together on one server. The budget label is relative, not a current Silver quote. Reserve enough to replace the whole set after a loss.
Evaluate it before upgrading
Begin in a non-lethal setting and record the activity, tier, Item Power, ability unlocks, clear time, deaths or knockdowns, repairs and consumables. Change one slot or spell at a time and compare repeated runs. These are instructions for your own practice, not measured performance results from MyAlbionDB.
For lethal zones, budget the full set and carried inventory as a possible loss. Do not use an untested equipment example as evidence that a matchup or transport route is safe.
Practice with a repeatable loss budget
Price every slot, food, potion, and mount before departure. The relative Low budget label does not quote current prices. Start with a complete set you can replace more than once, and keep the rest of your reserve out of the cargo you carry.
Scout your route and exits before dismounting. Keep a mobility option for leaving rather than using every movement ability to reach a target. Avoid taking this solo example as a plan for fighting organized groups.
Change one slot for a specific problem
If you need another defensive effect, compare that armor or head ability with the listed example before purchasing it. If you need more damage, check whether ability timing or uptime is the real limitation. A higher-priced variant does not fix every weakness.
Record repair and consumable costs along with successful loot sales. Compare several trips rather than the best one. This equipment plan has not been independently tested against current matchups.
Ability source: ao-bin-dumps revision 0be6a5e7. Source validation does not establish current gameplay performance.